


GeoDirectory Options – Setup Tutorials
1. Geo Directory Options
More point and click options for GeoDirectory. Show profile tabs by listing owner or non-listing owner. Users can choose any category they want to display.
-
This section introduces additional customization options in GeoDirectory.
-
You can display profile tabs depending on whether the user is a listing owner or not.
-
Users are also able to select any category they wish to display.
2. Required Plugin
Both plugins are required to use GeoDirectory Options correctly. Ensure that these plugins are installed and activated before proceeding with setup.
-
wpapps Press
-
wpapps GeoDirectory Options
3. Basic Setup
The Custom Fields Checker Script Addon is a useful tool designed to help administrators keep track of custom fields created within GeoDirectory and UsersWP. Over time, as websites grow and undergo changes, some custom fields may be removed or no longer exist in the database. Without proper monitoring, this can lead to inconsistencies, broken references, or even missing data.
This addon ensures that administrators are always aware of such changes by automatically comparing the list of configured custom fields with the existing fields in the database. It not only provides a detailed activity log but also offers email notifications to alert admins immediately when differences are detected. The addon can be run manually at any time, or it can be scheduled to run automatically at regular intervals.
By using the Custom Fields Checker Script, website owners and managers can maintain better control over their data, reduce errors, and improve overall stability in their GeoDirectory-powered websites.
4. Activating the Addon
Before you can begin monitoring your custom fields, you need to activate the addon:
- Navigate to wpapps > GeoDirectory > General from your WordPress dashboard.
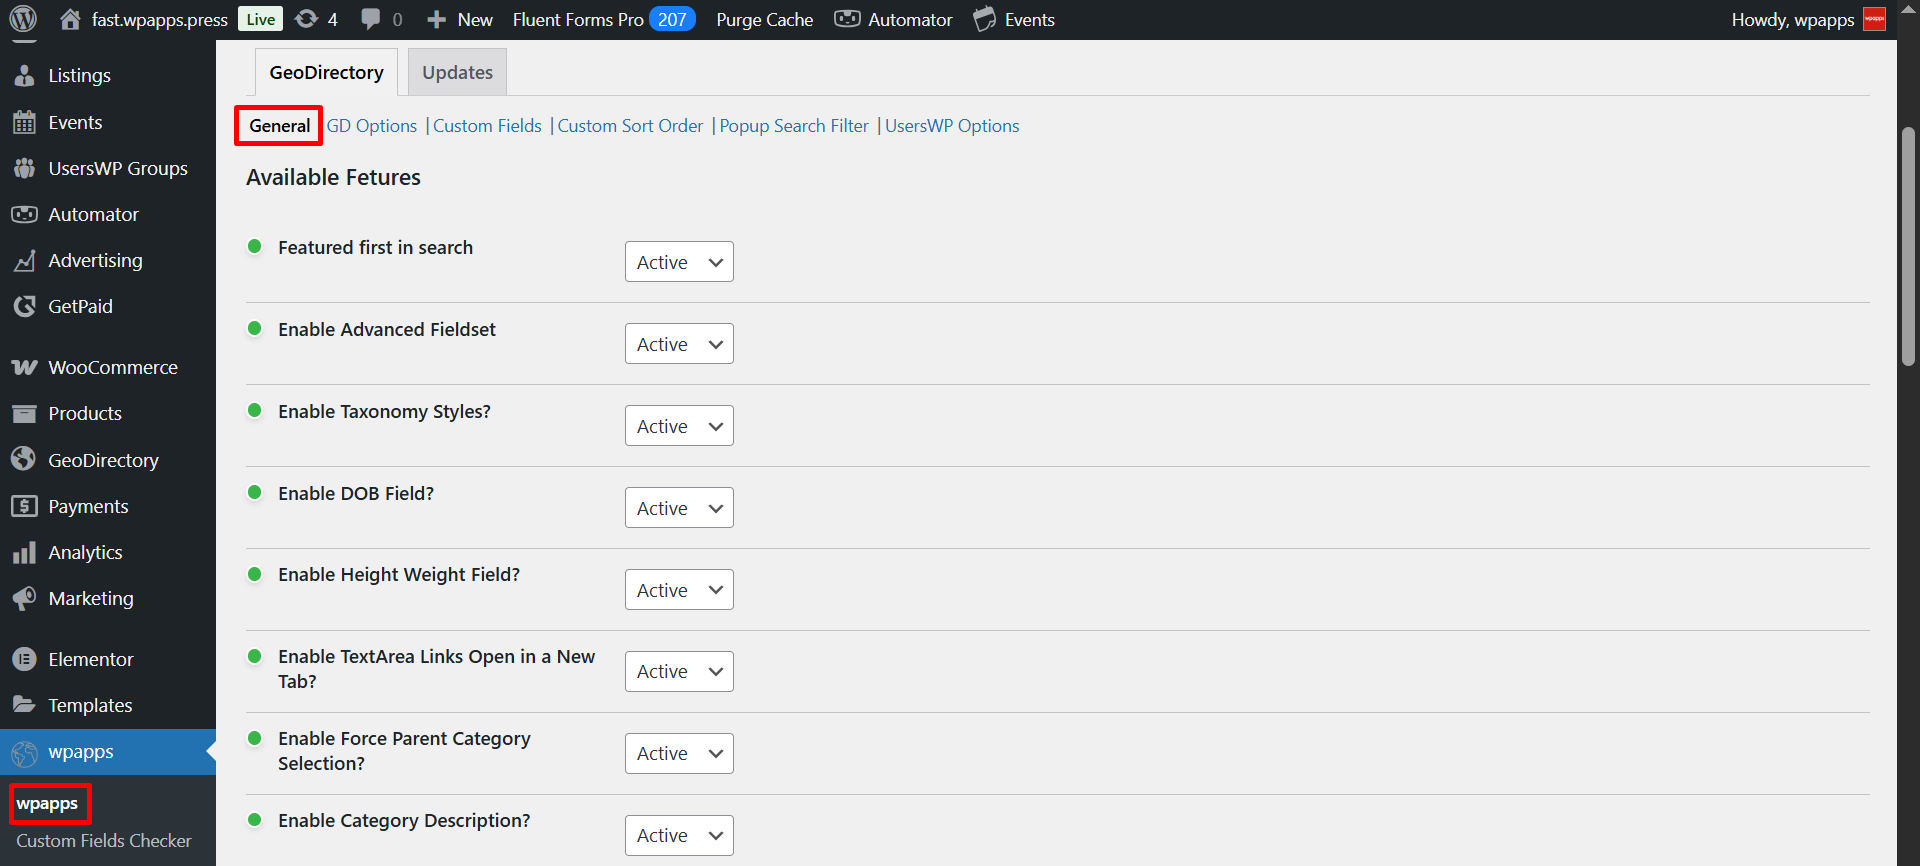
- Locate the option labeled Custom Fields Checker Script Addon.
- Click Activate and then select Save Settings to confirm.
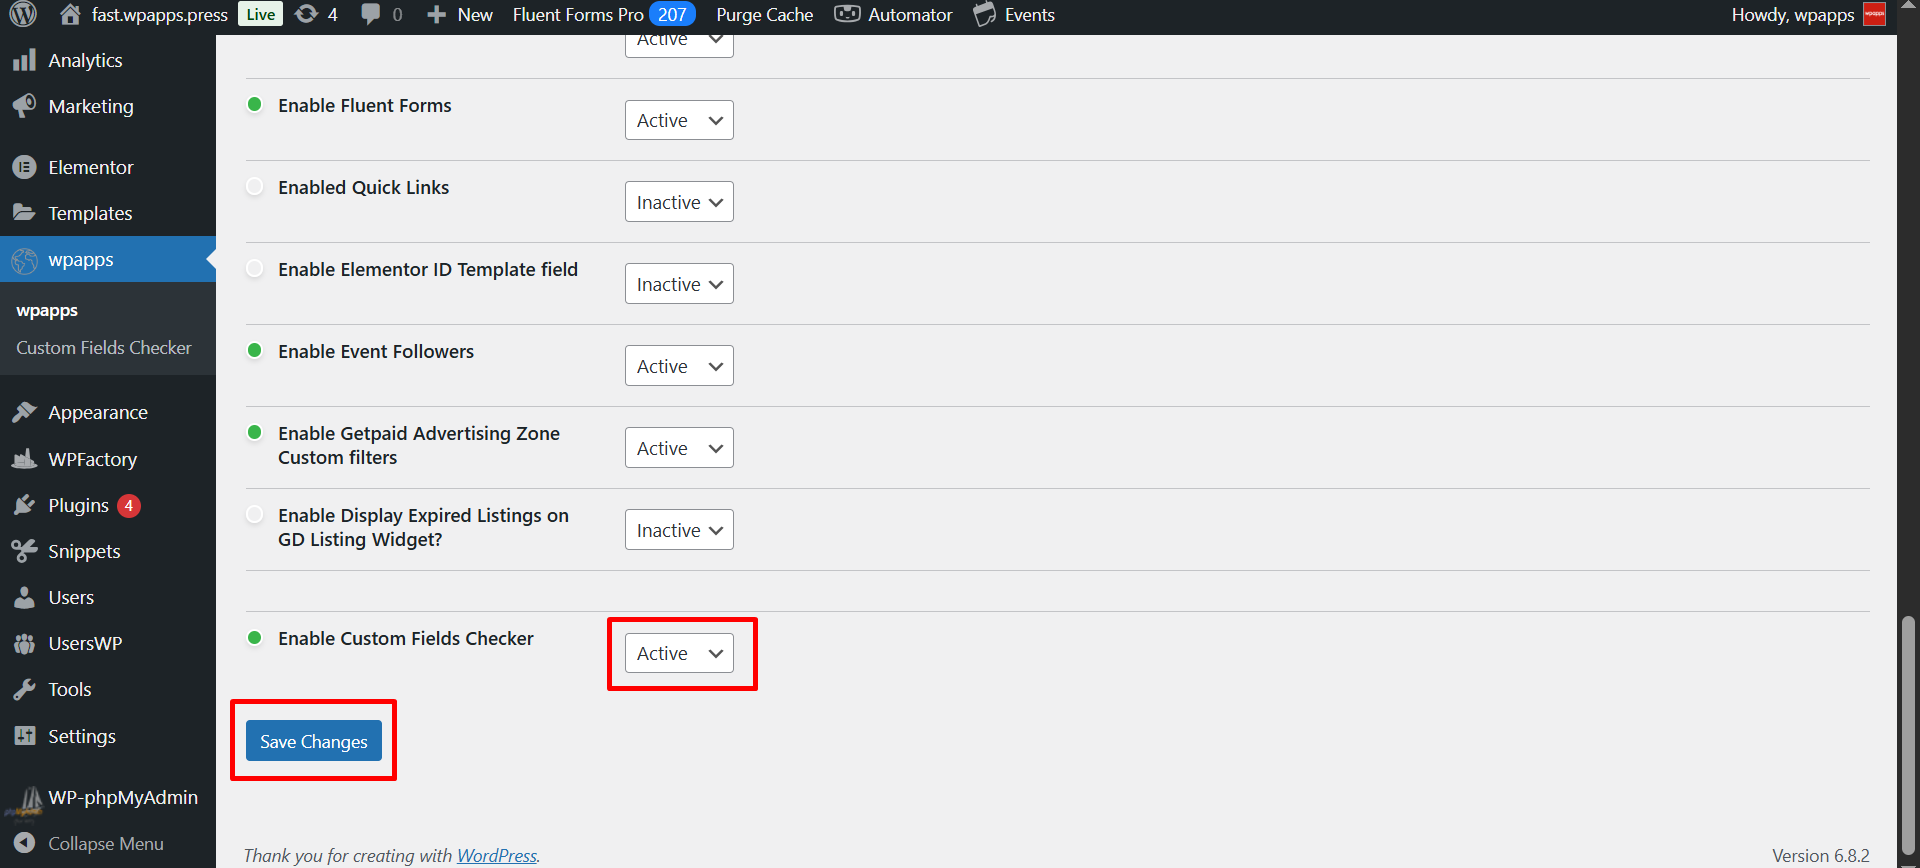
Once the addon has been successfully activated, new menu links will appear under the wpapps menu. These links give you access to the Custom Fields Checker page, where you can configure settings, run checks, and review logs.
5. Execution of the Scheduled Action & Manual Check
In addition to setting up the schedule, the system will also run an automatic comparison process whenever the scheduled action is executed.:
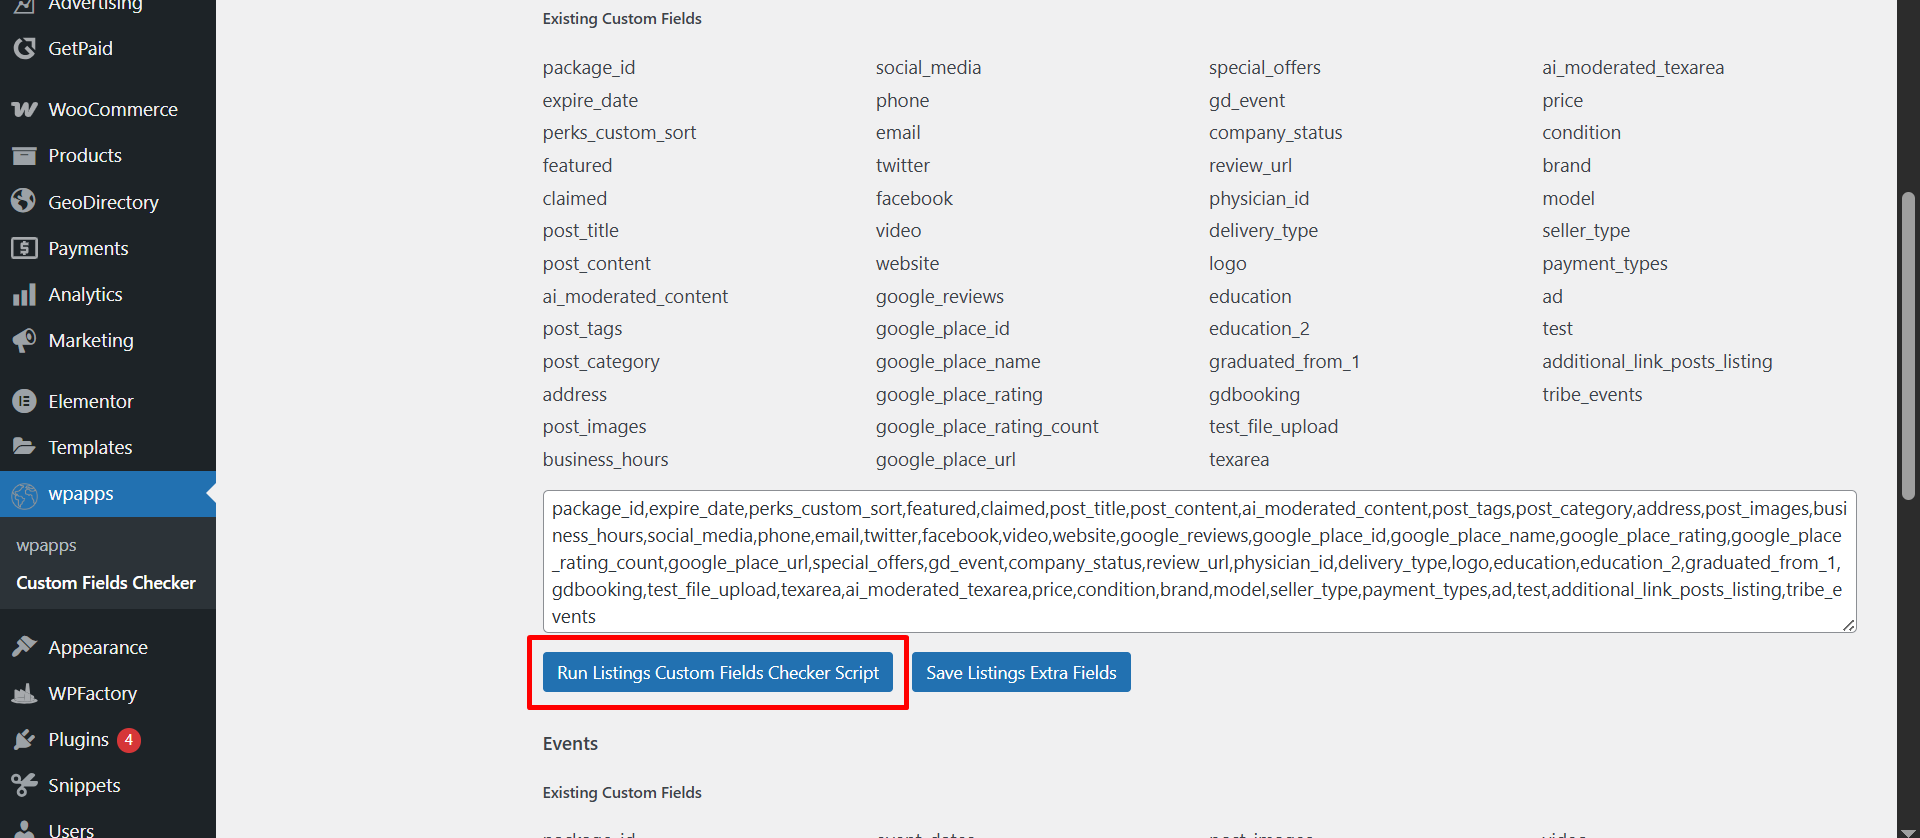
- The script will retrieve the list of custom fields entered in the text area on the settings page.
- It will then compare these fields against the custom fields currently available in the database.
- This ensures that any fields which have been deleted or are no longer present can be detected immediately.
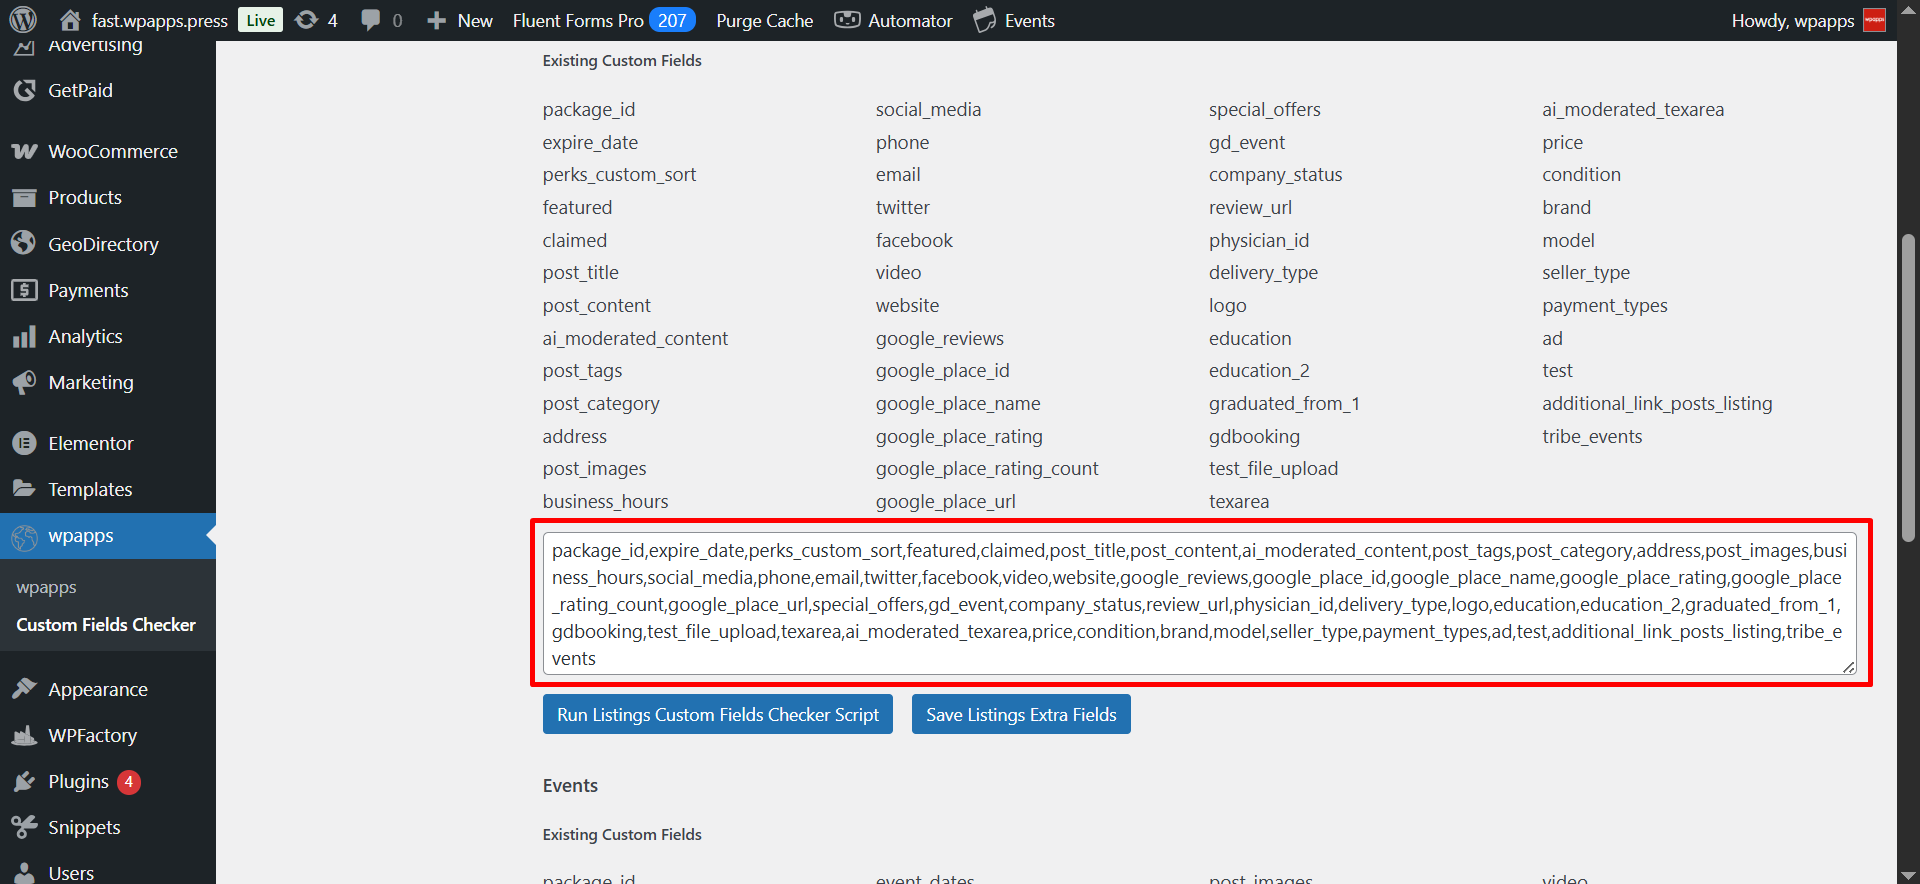
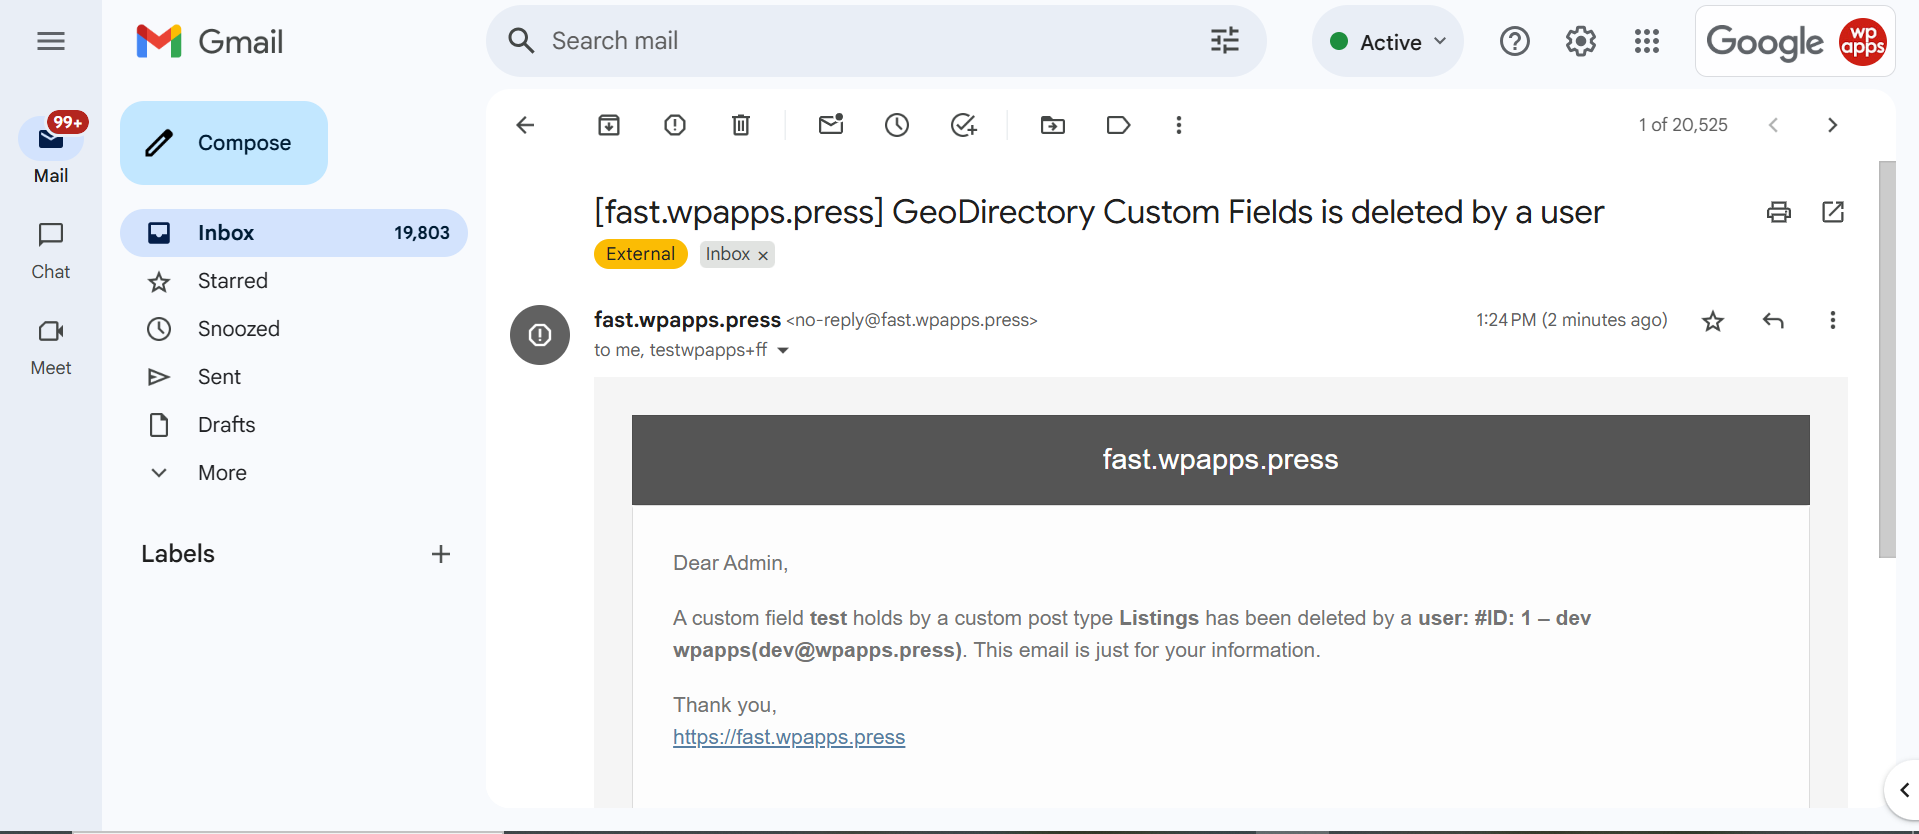
- If the system detects differences during this comparison, it will also trigger an automatic email notification to the site administrator.
In addition to the automated process, you can also run a manual check at any time from the Custom Fields Checker page.
- You can also perform a manual check of the custom fields at any time.
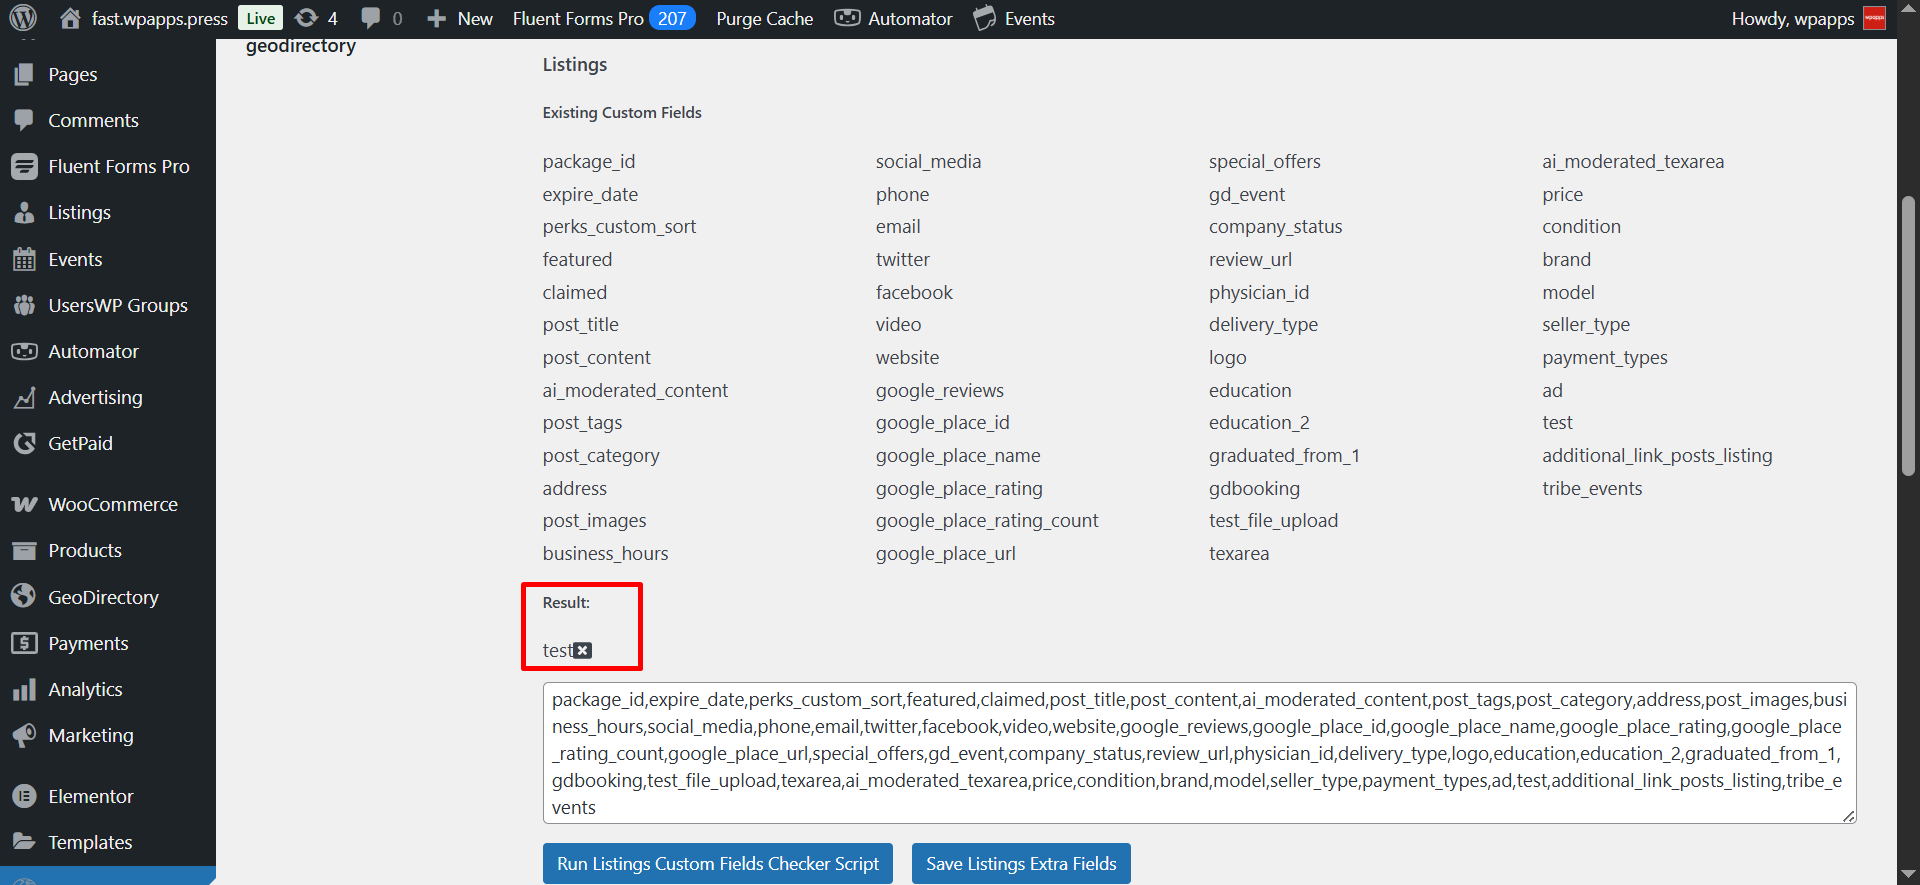
- Manual checks will not generate email notifications — results are displayed instantly on-screen.
- The system will immediately show a list of custom fields that no longer exist in the database, allowing quick verification.
- The notification email will include a detailed list of the deleted or missing fields, ensuring administrators are always informed.
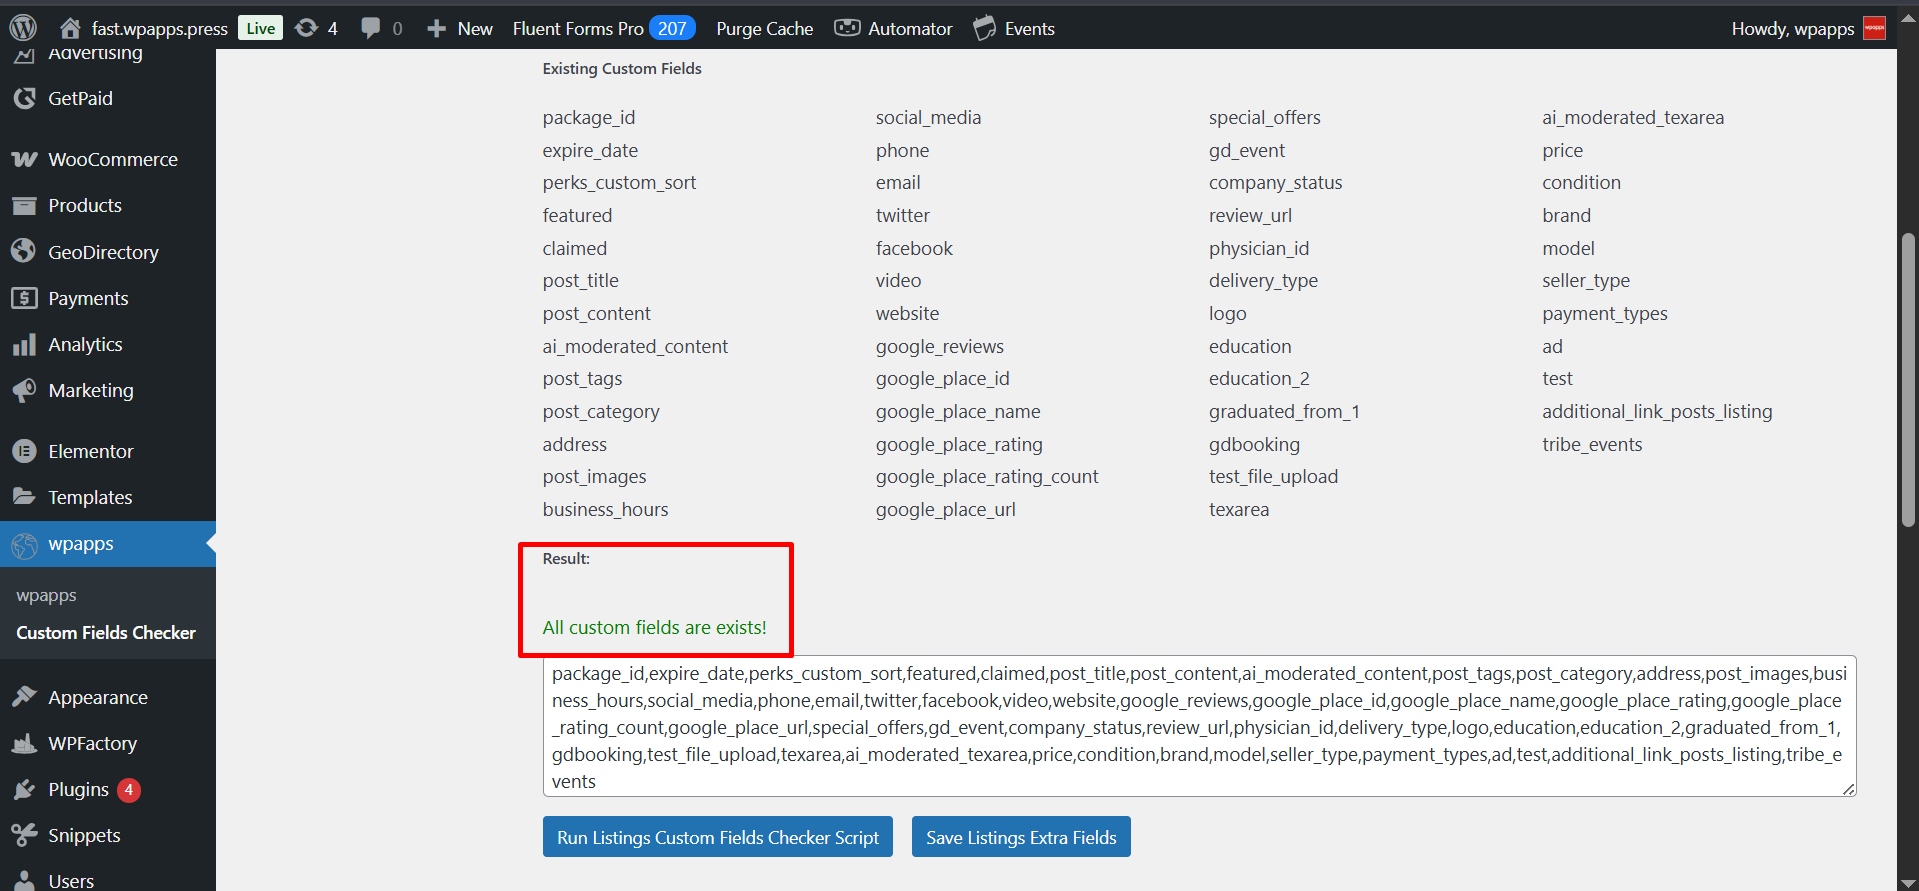
- If the script does not detect any differences between the stored custom fields and the ones currently in the database, it will simply return a confirmation message. This message indicates that all custom fields are up-to-date and no action is required.
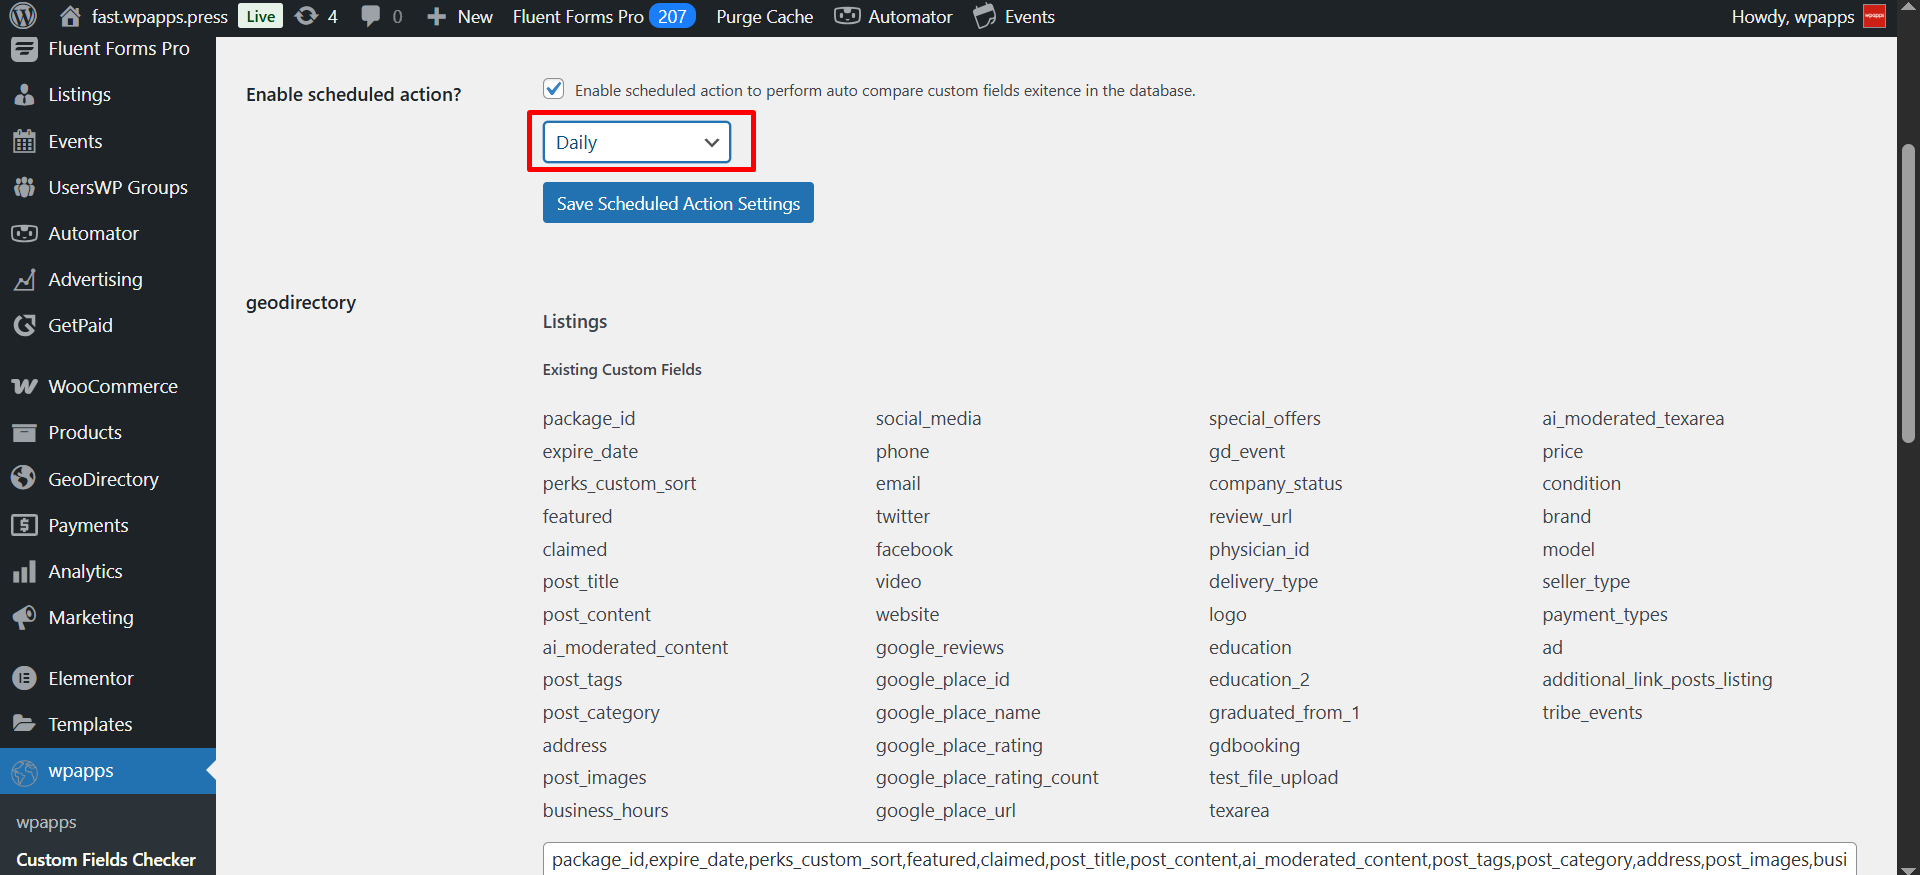
6. Setting Up Scheduled Actions
One of the most powerful features of this addon is its ability to automatically check custom fields on a recurring basis. This prevents administrators from having to manually run checks every time.
- Go to the Scheduled Action Settings section.
- Enable the scheduled action option.
- Choose your preferred frequency: Daily, Weekly, Monthly, or Yearly, depending on how often you want the script to run.
The scheduled action name should follow this format:
wpapps_{frequency_type}_custom_fields_checker_action
- For example:
- Daily → wpapps_daily_custom_fields_checker_action
- Weekly → wpapps_weekly_custom_fields_checker_action
- Once you save your settings, the scheduled action will automatically be generated.
You can verify that the action has been created by visiting the Action Scheduler:
- General Action Scheduler: https://URLSITE/wp-admin/tools.php?page=action-scheduler
- Filtered for Custom Fields Checker: https://URLSITE/wp-admin/tools.php?page=action-scheduler&s=custom_fields_checker&action=-1&paged=1&action2=-1
Important Note: If you decide to switch the frequency (e.g., from weekly to daily), the previously scheduled action will be canceled automatically. This ensures that there are no duplicate tasks running in the background.
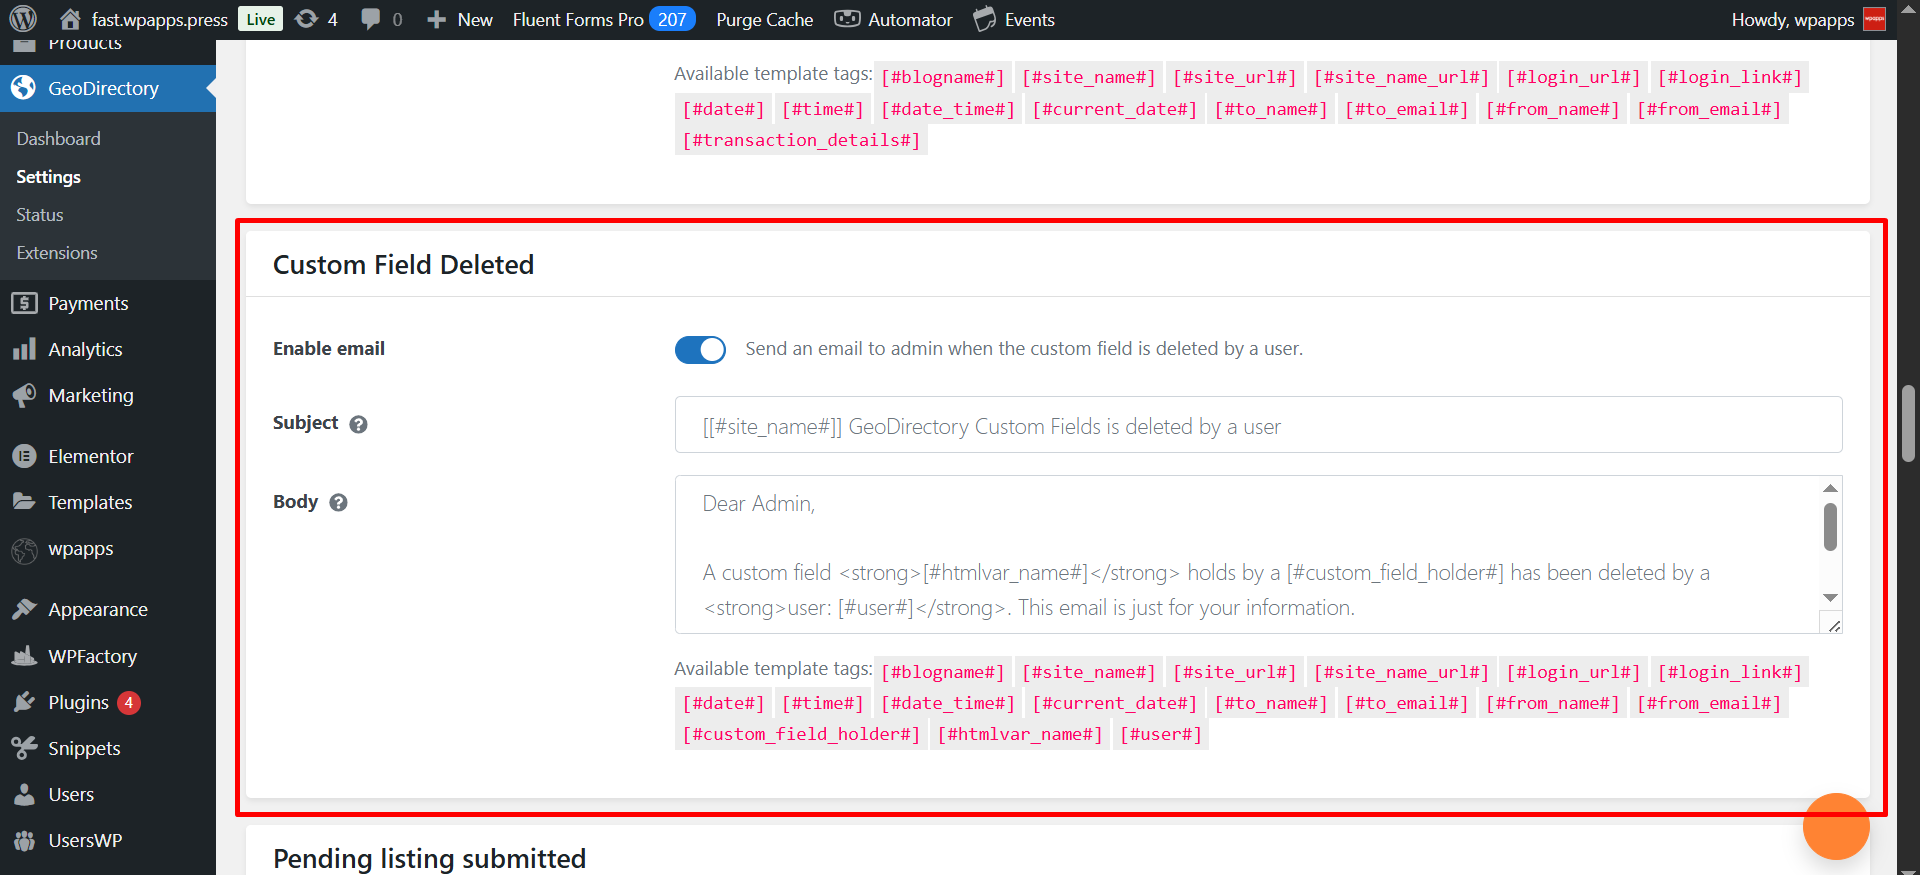
7. Email Notification System
To ensure administrators are always informed, the addon comes with an integrated email notification system. When differences are detected (for example, when a field exists in the database but not in the stored list, or vice versa), an automatic notification is sent to the admin email address.
- Notification logs can be reviewed in the Activity Log.
- Email templates for these notifications can be customized. To edit them, navigate to:
GeoDirectory > Settings > Emails > Admin Emails
Or directly open this link: https://URLSITE/wp-admin/admin.php?page=gd-settings&tab=emails§ion=admin_emails
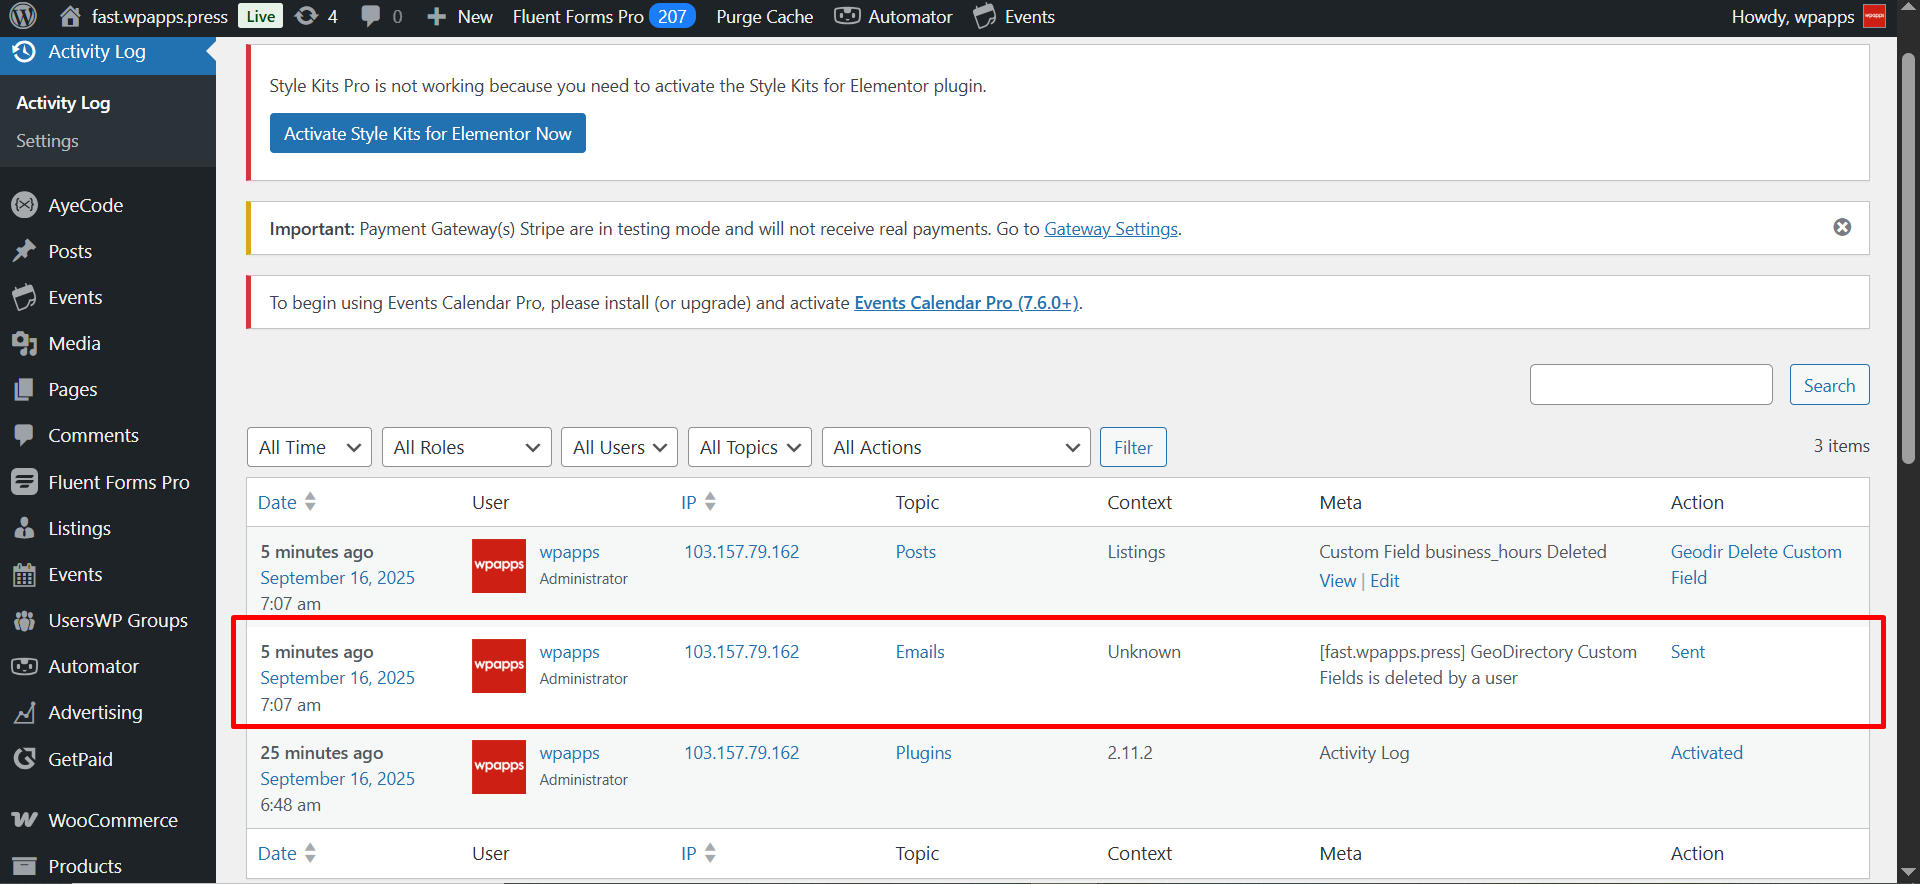
8. Reviewing Activity Logs
Every time the script runs—whether manually or on a schedule—its actions are recorded in the Activity Log. This log helps you keep track of all changes and monitor deleted custom fields.
- You can review all changes in the Activity Log, giving you full visibility of what has been modified or deleted. The plugin for this feature is free and available here: Activity Log Plugin.

- To access the log, go to: https://URLSITE/wp-admin/admin.php?page=activity-log-page
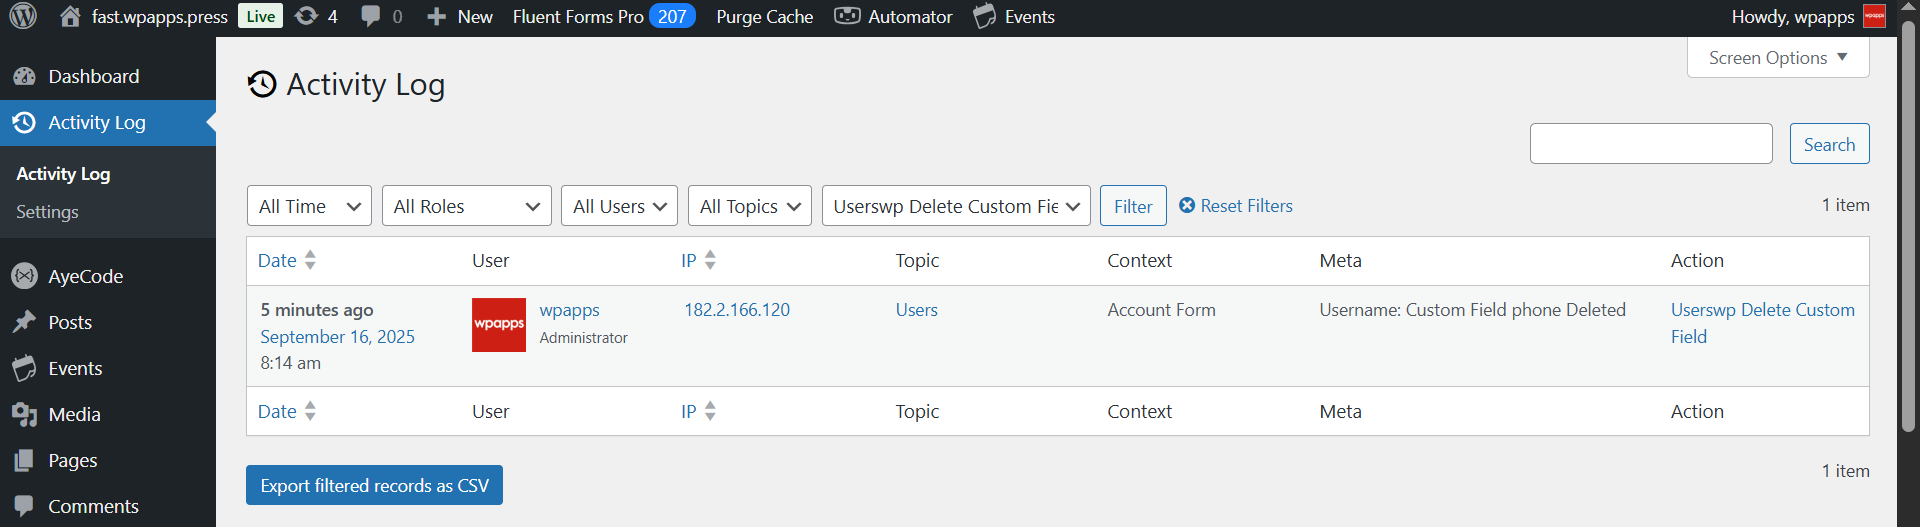
- You can apply filters to refine the results:
- GeoDirectory: Use the filter Geodir Delete Custom Field to track deleted fields related to GeoDirectory.
- UsersWP: Use the filter Userswp Delete Custom Field to monitor deleted fields in UsersWP.
- GeoDirectory: Use the filter Geodir Delete Custom Field to track deleted fields related to GeoDirectory.
By reviewing the activity log regularly, you can easily identify which fields were removed, when the removal occurred, and under which plugin it happened.
Summary :
The Custom Fields Checker Script Addon is an essential safeguard for any GeoDirectory-powered website. It ensures that custom fields remain consistent, prevents data loss, and gives administrators real-time visibility into field changes. With flexible scheduling, detailed activity logs, and automated email notifications, you can rest assured that your site’s data structure is always monitored and under control.
By activating this addon and configuring it properly, you can save time, reduce errors, and maintain the long-term stability of your website.
To start using the Custom Fields Checker Script Addon and unlock all its features, you can subscribe via GeoDirectory Options. Once subscribed, you can immediately set up the addon and start monitoring your custom fields with ease.
Subscribe and set up the addon now: GeoDirectory Options
